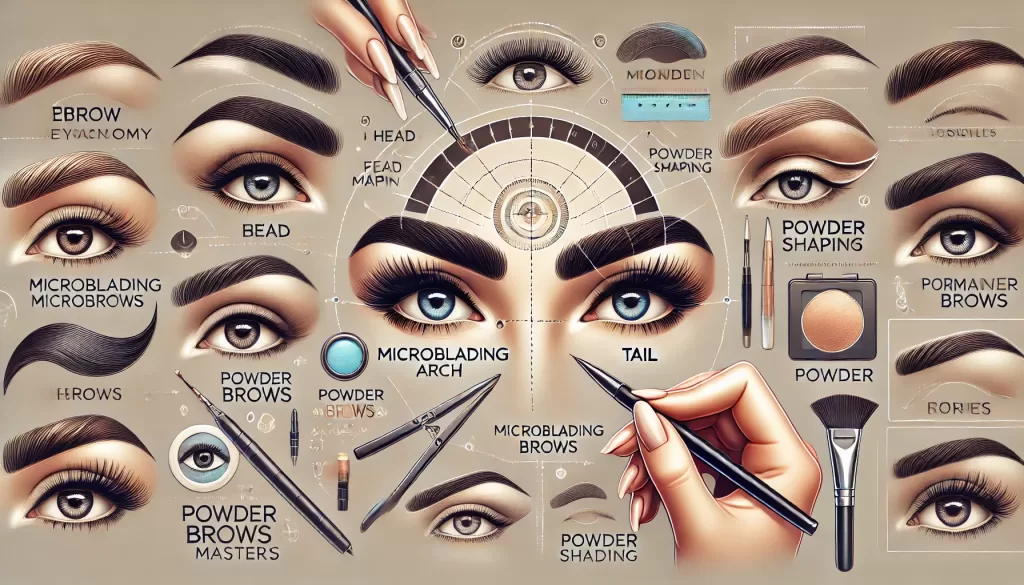
Master Eyebrow Techniques for Permanent Makeup Mastery
Permanent Makeup Eyebrow Techniques: Permanent makeup is revolutionizing the beauty industry, offering clients long-lasting, low-maintenance solutions for enhancing their features. Among the most sought-after services are eyebrow techniques, which blend artistry and precision. Module 1 of the “2-in-1 Permanent Makeup Mastery” program delves deep into the art and science of eyebrow enhancement. From understanding brow anatomy to mastering advanced techniques like microblading and powder brows, this guide equips aspiring artists with the skills to create stunning, bespoke results.
Permanent Makeup Eyebrow Techniques
In this comprehensive article, we explore eyebrow theory, mapping and shaping, microblading, powder brows, and the innovative combination brow technique. Follow this step-by-step guide to achieve excellence in eyebrow artistry and establish yourself as a trusted professional in the permanent makeup industry.
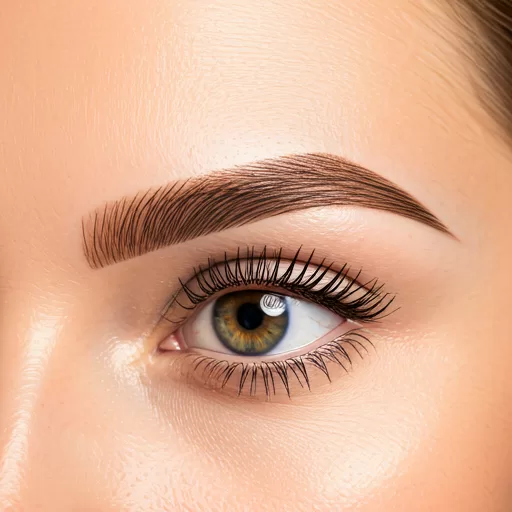
Eyebrow Theory: The Foundation of Perfect Brows
Understanding Brow Anatomy
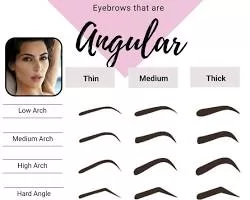
Before diving into techniques, it’s crucial to understand eyebrow anatomy. Eyebrows are composed of three main parts: the head, arch, and tail. Each part plays a vital role in defining facial expressions and symmetry. Knowing how hair growth patterns vary across these sections is key to creating natural results.
Key points to consider:
- The head begins near the bridge of the nose and should align vertically with the nostril.
- The arch is the highest point, ideally located about two-thirds from the start of the brow.
- The tail tapers off diagonally, aligning with the outer corner of the eye.
Brow Shapes and Their Impact
Every face is unique, and the shape of the brows should complement facial structure. Popular brow shapes include:
- Arched Brows for a dramatic and lifted look.
- Rounded Brows for softening angular features.
- Flat Brows to balance elongated faces.
- S-shaped Brows for a more exotic appearance.
Design Principles for Beautiful Brows
Effective brow design relies on three principles:
- Symmetry: Both brows should appear balanced when viewed from a distance.
- Proportion: Use tools like a caliper or golden ratio divider to ensure proper dimensions.
- Suitability: Consider the client’s preferences, facial features, and natural brow structure.
Permanent Makeup Eyebrow Techniques
Mapping and Shaping: The Blueprint for Tailored Brows
The Art of Brow Mapping
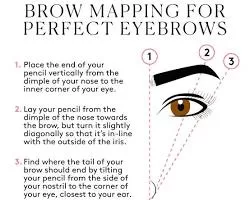
Brow mapping ensures accuracy and consistency. This method uses facial landmarks to outline the ideal brow shape for each client. Steps include:
- Identify the Starting Point: Align vertically with the inner corner of the eye and nostril.
- Mark the Arch: Position it above the iris when looking straight ahead.
- Define the Tail: Extend diagonally from the nostril to the outer corner of the eye.
- Connect the Dots: Draw lines to shape the brow, ensuring even proportions.
Why is Mapping Crucial for Even and Symmetrical Brows in Microblading?
Precision is Key
Mapping serves as the foundational blueprint for microblading, and it’s essential for crafting brows that are both even and symmetrical. This meticulous process ensures the initial design aligns perfectly with your client’s facial features. Spending adequate time—typically between 20 to 45 minutes—on mapping can significantly impact the final outcome.
Customization for Client Satisfaction
During the mapping phase, understanding your client’s preferences is vital. Ask them about their desired shape, whether they prefer a pointy or round arch. These insights help tailor the brow design to meet their expectations.
Step-by-Step Accuracy
Begin the process by having your client sit up to confirm the brows’ symmetry in a natural, upright position. This initial check prevents any imbalance before proceeding. After mapping, use surgical dots as guideposts to maintain consistency throughout each microblading pass.
Continuous Adjustments
Throughout the microblading process, frequent checks are necessary. After every pass—whether it’s the first, second, or final—have your client sit up again. This allows for real-time adjustments, ensuring that each brow remains consistent in shape and alignment.
Achieving Flawless Results
Ultimately, detailed mapping culminates in achieving balanced and symmetrical brows that enhance your client’s natural beauty. By prioritizing this crucial step, the final result is not only aesthetically pleasing but also deeply satisfying for the client.
Shaping Techniques for Precision
Shaping involves removing stray hairs and creating a clean canvas. Techniques include:
- Tweezing for precision.
- Threading to shape and define.
- Waxing for quick, clean lines.
Pro Tip: Always step back and assess symmetry from multiple angles during shaping.
Permanent Makeup Eyebrow Techniques
Microblading: Creating Natural Hair Strokes
What is Microblading?
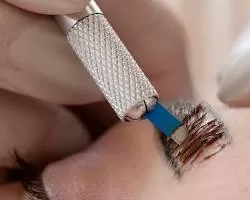
Microblading is a semi-permanent makeup technique that uses a handheld tool with fine needles to deposit pigment into the skin. This method mimics individual hair strokes, resulting in a natural and realistic appearance.
Steps to Master Microblading
- Preparation: Sanitize the area and apply a numbing cream for client comfort.
- Brow Mapping: Use the principles outlined earlier to outline the desired shape.
- Pigment Selection: Choose a color that matches the client’s natural brow hair.
- Application: Create light, feathered strokes following the direction of natural hair growth.
- Healing Process: Provide aftercare instructions, emphasizing the importance of avoiding water and makeup for the first 7-10 days.
How to Place Surgical Dots in Microblading to Prevent Blue Marks
Step 1: Position Dots Within the Outline
Begin by placing your surgical dots inside the designated outline of the brow. By doing this, you’ll ensure that the microblading process covers these dots completely, eliminating any visible markings once the procedure is completed.
Step 2: Start a Few Strokes In
Make sure to begin placing your dots a few strokes from the front of the outline. This strategic starting point helps ensure a natural transition at the beginning of the brow and keeps the dots well-concealed.
Outcome: Clean, Visible Brow Without Blue Dots
By following these steps, your client will leave with beautifully shaped brows and no leftover blue dots. This approach enhances the overall result and boosts client satisfaction by removing any unwanted residue from the procedure.
Using a Slanted Microblade as a Shader in Microblading
Why Use a Slanted Microblade?
A slanted microblade is typically used for creating hair-like strokes in microblading. However, with a bit of technique adjustment, it can be utilized as an effective shader, particularly for those small areas where opening a separate tool seems excessive.
Steps for Shading with a Slanted Microblade
- Identify Shading Areas: Focus on tiny, detailed sections like the tail of the eyebrow. This is where precision is key, and the slanted microblade can provide that level of control.
- Angle and Pressure: Adjust the angle of the microblade slightly less vertical than you would for creating strokes. Apply gentle, even pressure to deposit pigment evenly without cutting deeper into the skin.
- Feathering Technique: Use a light, feather-touch motion to blend the pigment. This technique helps mimic the effect of shading, especially in those thinner areas like the eyebrow tail where density might be less.
- Layer for Depth: For a gradual transition and depth, layer the shading by going over the area multiple times. Be cautious not to overdo it, as the goal is subtle enhancement rather than a heavy look.
By adapting these steps, you can efficiently use a slanted microblade to perform tasks usually reserved for a separate shader, streamlining your toolkit and process in microblading.
Understanding the Purpose of Pre-Stroke Pigmentation in Microblading
Before diving into the microblading process, there’s a crucial step that can significantly enhance client satisfaction: painting a pre-stroke with pigment. Here’s why this preliminary move is an essential part of the procedure:
Visual Preview for Clients
By applying a line of pigment on the skin without making any incisions, you provide clients with a visual preview of where the hair strokes will eventually be placed. This gives clients an invaluable opportunity to visualize the final result and decide if the positioning aligns with their expectations.
Collaborative Decision-Making
This technique fosters a collaborative decision-making process. Clients can actively participate by expressing their preferences and adjustments before any permanent work begins. For instance, some may prefer avoiding a denser look at the front of the eyebrow, which is often a sensitive area.
Simplified Adjustment Process
Adjustments can be made effortlessly with a mere wipe of a cotton pad if any pigment lines seem off-target. This flexibility can save time and prevent the dissatisfaction that comes from more permanent alterations.
Improved Final Results
When clients are happy with the initial placement, it translates to fewer corrections later and results in a more tailored, natural-looking eyebrow. This method minimizes the risk of creating overly bold strokes, particularly near the sensitive inner brow area.
Incorporating pre-stroke pigment lines serves to enhance communication, precision, and satisfaction, ensuring each client’s unique preferences are met with the utmost care.
How Can a Magnifying Headlamp Aid in Achieving Precise Microblading?
Using a magnifying headlamp can significantly enhance the precision of your microblading work. If you’re someone who wears glasses throughout the day, a magnifying headlamp is a must-have tool. Here’s why it’s essential:
- Enhanced Visibility: The magnification helps you see the fine details of the skin clearly, allowing you to identify every intricate spot easily. This ensures that you don’t overlook any area while working.
- Improved Accuracy: By providing a closer view, the headlamp aids in avoiding the overlap of hair strokes and maintains their proper alignment. This precision is crucial in creating a natural and flawless look.
- Controlled Technique: With better visibility, you can accurately determine the starting point and direction of each stroke. This level of control is vital for achieving the desired shape and symmetry in eyebrows.
Incorporating a magnifying headlamp into your microblading process can elevate the quality of your work, ensuring consistent and precise results every time.
Why Use Multiple Blades in Microblading?
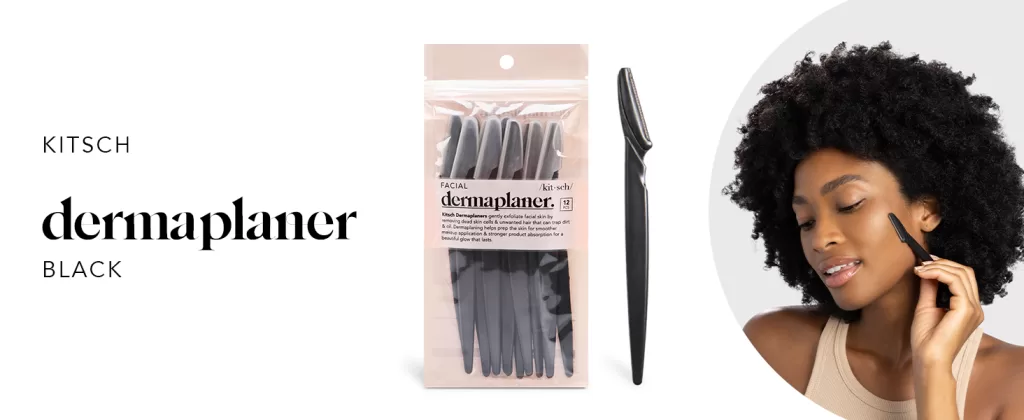
Utilizing more than one blade during a microblading session can significantly enhance the precision and quality of the results. Here’s why it’s recommended:
Enhanced Precision and Control
- Initial Pass with a Standard Blade: Starting with a standard blade, such as a Classic 9, provides the ability to create crisp, sharp lines. This blade is ideal for the initial strokes, offering better precision and control as you outline the shape.
- Follow-Up with a U-Shaped Blade: For the subsequent pass, switching to a U-shaped blade offers a different level of flexibility. This type of blade allows for more fluid movement, which is essential when refining strokes and ensuring they look natural and consistent.
Improved Outcome
- Multiple Passes for Better Definition: By using different blades for various passes, you can create more defined lines and achieve a more polished appearance. The initial strokes lay down the base, while the follow-up strokes with a different blade enhance the depth and detail.
- Customized Experience: Each blade serves a unique purpose, allowing the technician to tailor their approach based on the client’s skin type and desired outcome. This customization leads to a more personalized and satisfying result.
In summary, opting for multiple blades in microblading allows for greater flexibility and precision, helping achieve the desired look with better-defined strokes and a natural finish.
Why Start with Pigment-Free Strokes in Microblading?
When you’re performing microblading, initiating your first pass with a blade free of pigment can significantly enhance your results. Here’s why:
- Clear Visibility: Starting without pigment allows you to see the skin and the strokes more clearly. Without the obstruction of pigment, you can precisely gauge where each stroke is and ensure they are aligned and properly spaced.
- Assess Skin Reaction: With a clear view, you can better assess how the client’s skin reacts to the blade. Each individual’s skin varies in texture and sensitivity. By observing closely, you can adjust your technique early in the process to accommodate any particularities.
- Minimize Errors: Without pigment initially, it’s easier to spot and correct any minor directional errors. If you need to adjust your technique, you can do so right away without having to worry about the cleanup or correction of misplaced pigment.
- Enhance Pigment Absorption: After creating clean, precise strokes, applying pigment using a microbrush allows for better absorption into the freshly opened skin. The skin isn’t hampered by excess pigment, which can sometimes create a barrier.
In conclusion, starting your microblading process with pigment-free strokes is pivotal for achieving clear, well-defined results. It offers an opportunity for precision and adaptability in your technique, leading to a more satisfying outcome for both the artist and the client.
How Does a Three-Point Stretch Enhance Microblading Results?
Microblading is an art that requires precision. One technique to elevate your results is the three-point stretch. But how does it actually improve the outcome of the procedure?
Improved Skin Tension
The three-point stretch technique involves using your fingers from both hands to stretch the skin around the brow area. Specifically, imagine employing your thumb and index finger from one hand to anchor the skin, while the pinky finger of your microblading hand pulls gently in the opposite direction. This creates optimal skin tension, which is crucial for achieving detailed artistry.
Cleaner, Crisper Lines
When the skin is taut, the microblading tool can glide more smoothly across the surface. This tension ensures that each stroke of the blade is clean and precise, leading to defined, sharp lines. The result? Eyebrows that look natural and resonate with depth and realism.
Enhanced Pigment Retention
Proper skin stretching can also aid in pigment implantation. A tense surface allows the pigment to be deposited more effectively into the dermis. This means fewer touch-ups and longer-lasting results, saving both time and resources for your client.
Optimal Comfort
A secure and steady hand not only benefits the technician but also enhances client comfort. When the skin is stretched correctly, it minimizes unnecessary pressure or extra passes, making for a more pleasant experience and reducing the risk of discomfort.
By mastering the three-point stretch, you can significantly refine your microblading technique, offering clients the well-defined, natural-looking brows they desire.

Microblading Tips and Tricks for Newbies
Diving into the world of microblading can be both exciting and daunting. As a beginner, you might be searching for advice that helps you craft cleaner, more precise brows. Here’s a curated list of tips and tricks to guide you through your early microblading journey.
1. Master the Three-Point Stretch
Start by perfecting the three-point stretch technique. Use your non-dominant hand’s thumb and forefinger to hold the skin taut and add support with your pinky. This method ensures your lines are crisp and precise.
2. Try Pigment-Free Strokes First
On your initial or second pass, make strokes without pigment. Follow up with a microbrush to apply the pigment. This technique allows for clearer visibility of the skin, making it easier to gauge the depth and placement of each stroke.
3. Strategize Your Front Strokes
When working on front strokes, save them for last. Begin your work a few strokes away from the front to prevent overly dense brows. Collaborate with your client to decide on any extra strokes at the front. This partnership not only maximizes client satisfaction but also gives them a say in the final outcome.
4. Use Multiple Blades
Incorporate more than one type of blade for your passes. A basic blade, like a Classic 9, can create crisp initial lines, while a U-shaped blade provides fluidity for subsequent passes. This approach ensures better consistency and definition.
5. Equip Yourself with Magnification
Invest in a magnifying headlamp if you struggle with precision. This tool helps prevent overlapping strokes and enhances your precision, allowing you to perfect your technique by observing the skin’s nuances.
6. Plan with Pre-Strokes
Before opening the skin, paint a temporary line of pigment where you plan on creating a stroke. Let your client visualize the design before committing. This minor adjustment can hugely impact client satisfaction by avoiding overly intense front strokes.
7. Manage Bleeding Wisely
Be mindful not to overwork an area to the point of bleeding. Limiting to two or three passes helps avoid scarring and uneven pigment distribution as the skin heals. Keep in mind that some bleeding is natural for certain clients.
8. Shade with Your Microblade
If limited to shading small areas, such as the brow tail, use your slanted microblade as a shader. This technique grants precise control without the need for additional shading tools.
9. Flexible Starting Points
Avoid fixating on starting from the front. Experiment with beginning at different sections, like the tail, and ensure all parts blend seamlessly. Find a rhythm that results in a more balanced overall brow structure.
10. Thoughtful Surgical Dot Placement
When placing surgical dots, ensure they sit inside the outline. These dots will be covered during microblading, preventing any unwanted markings once your client leaves with their new brows.
11. Prioritize Mapping
Spend adequate time mapping out the eyebrows. This foundational step can take up to 45 minutes to ensure perfect symmetry and shape. Engage the client by inquiring about their preferences, such as arch shape, and frequently reassess the shape during the procedure.
Embrace Your Artistic Journey
Building your skills as a microblading artist takes time and dedication, but the satisfaction of delivering beautifully shaped brows makes the effort worthwhile. By implementing these tips, you’ll not only enhance your technique but also improve the experiences of your growing client base.
Benefits of Microblading
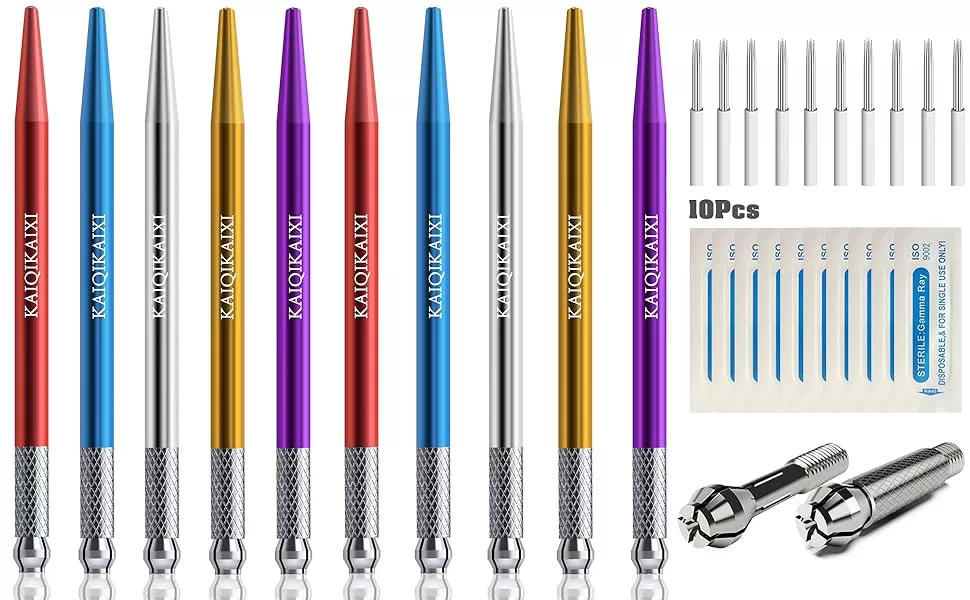
- Ideal for sparse or uneven brows.
- Provides a natural look.
- Results last up to 12-18 months with proper care.
Advantages of Starting Microblading Strokes from Different Parts of the Brow
Microblading is an art, and like any art, it offers flexibility in technique. The choice of where to begin your strokes can significantly impact the outcome and precision of your work. Here’s how starting from different parts of the brow can be advantageous:
- Customizable Brow Shape:
Starting at different points allows you to tailor the brow to the client’s unique face. Beginning at the tail can help balance the arch and ensure symmetry, while starting in the front can define the initial shape and density. - Precision and Control:
Artists often find that varying the starting point can enhance their control over the overall design. For instance, starting at the arch might help in maintaining a steady hand as you work towards the tail, ensuring more precise and natural-looking strokes. - Enhanced Symmetry:
By jumping back and forth between the fronts or tails of each brow, you can maintain better consistency between them. This approach minimizes discrepancies, resulting in more symmetrical brows. - Reduced Fatigue and Fresh Perspective:
Changing the starting point can prevent fatigue which often sets in when performing repetitive tasks. It also offers a fresh perspective on the brow’s progression, which can be crucial in achieving a cohesive look. - Adaptable to Different Brow Types:
Different starting points can adapt to varying brow thicknesses and growth patterns. For thinner brows, starting at the front for detailed strokes can be more beneficial, whereas thicker brows might benefit from starting at the tail to establish a flattering shape.
Utilizing flexible starting points in microblading provides artists with the ability to create stunning, personalized, and balanced brows for each unique client.
How Reducing the Number of Strokes Impacts Bleeding and Scarring in Microblading
When it comes to microblading, the number of strokes applied can significantly affect both the bleeding and the scarring outcomes. Here’s how:
Minimizing Bleeding
By limiting the number of times you go over each stroke to just two or three, the likelihood of excessive bleeding is reduced. Bleeding is a natural response for some individuals, but excessive passes can exacerbate it. A handful of professionals find that sticking to minimal strokes ensures a cleaner process, as it minimizes tissue trauma.
Reducing Scarring
Fewer strokes result in less trauma to the skin, which directly correlates to decreased scarring. When the skin is less disturbed, the healing process is smoother, and the chance of noticeable scars is diminished. This approach ensures that the pigment settles more precisely, contributing to an even and natural appearance when healed.
Optimal Pigment Retention
By not overworking the skin and finding the right balance—often referred to as the “sweet spot”—the pigment is less likely to spread under the skin. This controlled technique preserves the artwork’s definition and detail, ensuring that the final result looks refined and professional.
In summary, reducing the number of strokes in microblading not only minimizes bleeding and scarring but also enhances overall aesthetic outcomes by ensuring better pigment retention and clarity.
Benefit of Microblading Front Strokes Last:
Completing microblading procedures by saving the front strokes for last offers significant benefits, primarily centered around client satisfaction and involvement. By integrating this technique, artists enhance the client’s overall experience.
Many technicians might choose the brow shape they think suits the client best. However, saving the front strokes for last involves the client in the process, letting them contribute to the final look. This approach results in a more personalized outcome and clients leaving with brows tailored to their preferences.
Clients not only love this added consideration but also feel more empowered. They appreciate having a say in the process, and this collaborative approach often leads to higher levels of satisfaction with the final result.
Powder Brows: Soft and Defined Effects
Understanding Powder Brows
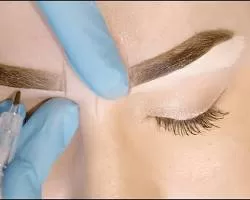
Powder brows, also known as ombré brows, use a machine to create a soft, shaded effect. This technique is perfect for clients seeking fuller, more defined eyebrows.
How to Create Powder Brows
- Preparation: Similar to microblading, begin with sanitation and numbing.
- Mapping: Outline the desired shape, ensuring symmetry.
- Shading: Use a rotary machine with fine needles to apply pigment in layers. Start lighter at the head of the brow and gradually intensify towards the tail.
- Aftercare: Advise clients to avoid peeling the area and use the provided ointment.
Advantages of Powder Brows
- Long-lasting results (1-3 years).
- Suitable for oily or mature skin.
- Offers a makeup-like finish.
Combination Brows: The Best of Both Worlds
What are Combination Brows?
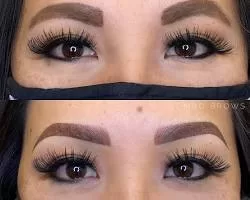
Combination brows blend microblading and powder techniques to achieve a unique, multidimensional look. The hair strokes from microblading add realism, while the shading from powder brows provides depth.
Steps to Create Combination Brows
- Start with Microblading: Outline the shape and create hair strokes in sparse areas.
- Add Powder Shading: Use a rotary machine to add softness and density.
- Refine the Look: Blend both techniques seamlessly for a natural yet polished finish.
Benefits of Combination Brows
- Highly customizable.
- Suitable for most skin types.
- Offers a balance between natural and defined brows.
FAQs: Permanent Makeup Eyebrow Techniques
- What is the difference between microblading and powder brows? Microblading mimics individual hair strokes for a natural look, while powder brows create a soft, shaded effect for fuller brows.
- How long do permanent makeup brows last? Microblading lasts 12-18 months, powder brows last 1-3 years, and combination brows depend on skin type and maintenance.
- Is permanent makeup safe? Yes, when performed by trained professionals using sterile tools and high-quality pigments.
- Can I combine microblading and powder brows? Absolutely! Combination brows blend both techniques for a customized look.
- What should I do before and after a permanent makeup session? Avoid alcohol, caffeine, and blood-thinning medications beforehand. Follow aftercare instructions carefully to ensure proper healing.

Explore more articles like this @ Where And How Resources
If you found this article helpful, don’t forget to share it with your friends and followers!

