What’s Your Makeup Routine? Tips for Every Step!
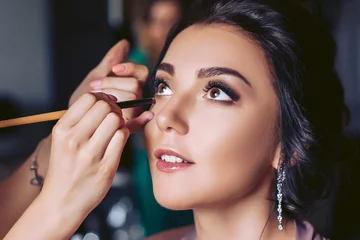
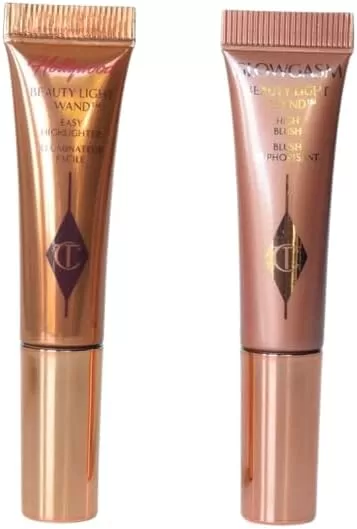
In today’s world, makeup is more than just beauty—it’s an art form, a confidence booster, and a way to express yourself. With the right tools and techniques, you can transform your Makeup Routine into a personal canvas of creativity.
Elevate Your Routine
- Start with Expert Tips: Seek advice from makeup artists and beauty influencers who share tutorials and insights. Their expertise can guide you in mastering new techniques.
- Choose the Right Products: Invest in quality products that suit your skin type and tone. From vibrant eyeshadows to bold lipsticks, the right choices can make a world of difference.
- Practice Makes Perfect: Like any art form, practice is key. Experiment with different styles and colors to discover what resonates with you.
Unleash Your Confidence
Expressing your creativity through makeup allows you to experiment and find the look that makes you feel like the most confident version of yourself. Whether it’s a subtle glow or a dramatic evening look, every brush stroke is a step towards self-assurance.
By embracing these elements, you transform your makeup routine into a journey of self-discovery and empowerment.
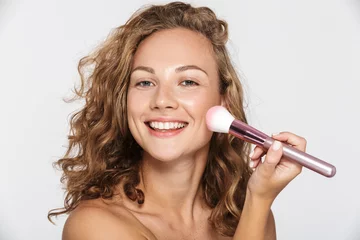
From Basic to Breathtaking: 3 Easy Makeup Hacks You Need to Try!
Makeup doesn’t have to be complicated to look incredible. Whether you’re a makeup beginner or just looking for some new techniques, these scientifically-backed and dermatologist-approved hacks can elevate your routine. Discover how to go from basic to breathtaking with just a few tweaks that personalize your look for any occasion.
1. Prep and Prime Like a Pro
Before diving into your makeup kit, start with the essentials: prepping your skin. Cleanse and moisturize according to your skin type to create a smooth canvas. A well-prepped skin ensures that your makeup stays flawless throughout the day.
Next, apply a primer that suits your skin’s needs. This step is crucial for minimizing pores and keeping your makeup in place. Use a light hand to apply primer, focusing on areas like the T-zone to control oil and create a matte finish.
2. Master the Art of Foundation and Concealer
Once your skin is prepped, it’s time to move on to foundation. Start by dabbing foundation on the T-zone—forehead, nose, cheeks, and chin. Blend with a foundation brush for a seamless finish. For beginners, a brush offers precision and ease.
Concealer comes next. Focus on areas needing extra coverage: under-eye circles, blemishes, and dark spots. Dab, don’t drag the concealer to maintain coverage. Try the inverted triangle method under the eyes for an instant brightening effect.
3. Add Dimension and Color
Contour and highlight are your best friends for adding dimension. Use a powder contour under the jawline, cheekbones, and along the hairline. For a softer approach, try a matte bronzer to practice your skills.
Highlight the high points of your face—above the cheekbones, brow arch, and nose bridge—for a natural glow. Remember to blend well for a seamless look.
When it comes to color, choose a bronzer just a shade darker than your skin tone. Blend it around your hairline, cheekbones, and jawline in a “3” shape for a sun-kissed glow. Add a hint of blush to the apples of your cheeks, blending upwards for a natural flush.
4. Eyes and Lips: The Finishing Touches
Your eyes are a canvas for creativity. Whether you prefer a subtle look or something more dramatic, always have eyeshadow, eyeliner, and mascara ready. For beginners, start with a creamy eyeliner close to the lashes for easy application.
Don’t forget your brows. A combination of pencil and brow powder can add definition and dimension, ensuring your brows frame your face beautifully.
Finally, swipe on your favorite lip products. Start with a lip liner to define your lips, then fill them in with lipstick for a polished finish. For added longevity, consider using a lip primer beforehand.
With these expert tips, the right products, and a little practice, you’re ready to take your makeup routine to the next level. It’s all about expressing your creativity and finding the look that makes you feel like the most confident version of you. Enjoy the process and remember, makeup is a journey—start at your own pace!

Building the Basics: Essential Makeup Steps
Makeup Routine: Why a Great Base Matters
Achieving a radiant finish starts with a great base. Your skin’s health and prep play a significant role in how makeup sits and lasts throughout the day.
- Cleanse and Moisturize
Starting with a clean slate is crucial. Use a gentle, dermatologist-approved cleanser to avoid irritation, followed by a moisturizer suited to your skin type. This helps create a hydrated canvas that allows makeup to blend more seamlessly. - Primer: The Key to Longevity
A primer works to even out skin texture, minimize pores, and extend the wear of your foundation. Look for primers formulated for your skin needs, such as mattifying, hydrating, or pore-filling options.- Apply in Fine, Sheer Layers: To achieve the best results, apply the primer in fine, sheer layers. This technique helps prevent the primer from balling or pilling, which can disrupt your makeup application.
- Focus on Key Areas: Concentrate the primer application on your forehead, cheeks, and chin—the T-zone. These areas are typically the oiliest and benefit the most from the mattifying and blurring effects of a primer.
- Achieve a Blurred, Mattified Finish: By applying the primer strategically, you can effectively blur imperfections and control shine in the T-zone, ensuring a smooth, long-lasting makeup look.
Next, consider the essential complexion products that will enhance your makeup routine:
- Foundation
Foundation is the core of any makeup routine. Choose one that matches both your skin tone and type, whether it’s liquid, powder, or cream.- Skin Type Compatibility: If you have oily skin, consider oil-free, mattifying foundations, while those with dry skin should look for hydrating, dewy formulas. Test shades on your jawline to find the closest match.
- Application Techniques: Use a damp beauty blender or brush for a more airbrushed look, blending from the center of your face outward for even coverage.
- Concealer
Concealer is your secret weapon for under-eye brightness and covering imperfections like dark circles, blemishes, and acne scars. Choose a formula with either a matte or dewy finish based on your desired look. - Highlighter and Contour
These tools sculpt and define your face, creating depth and glow. Contour products add shadows and definition, while highlighters emphasize areas you want to stand out, like cheekbones and the bridge of the nose. Experiment with powders, creams, or liquids to find the best fit for your skin type. - Blush and Bronzer
Use bronzer to achieve a sun-kissed glow, accentuating your features, while blush adds a healthy flush to the cheeks. Both are available in liquids, creams, and powders, providing versatility in application. - Setting Products
Lock everything in place with setting products. Setting powders are perfect for reducing shine and blurring pores, while sprays can add a touch of dewiness. Focus on areas prone to oiliness, like the T-zone, for a balanced finish.
By incorporating these essential products and techniques, you can achieve a flawless complexion that enhances your natural beauty while ensuring your makeup lasts all day.

Makeup Set GLAMZA 68 Piece Vegan Makeup Set for Women & Teenage Girls – Includes Silver
Enhance Your Appearance: A Beginner’s Guide to Face Makeup
Looking to enhance your natural beauty with makeup? Follow these beginner-friendly steps to achieve a flawless and radiant look.
Step 1: Prepare Your Skin
The foundation of great makeup is well-prepared skin. Start by cleansing and moisturizing according to your skin type. Properly hydrated skin ensures your makeup applies smoothly and lasts longer. Without this crucial step, makeup might settle into dry areas, leaving an uneven finish.
Step 2: Use Primer Wisely
Not all primers are suitable for all skin types. Choose one that complements your complexion, and apply a thin, even layer. This creates a smooth canvas, minimizing pores and reducing shine in oil-prone areas, known as the T-zone. A light touch prevents pilling of the product.
Step 3: Foundation and Concealer
Once your skin is prepped, apply foundation and concealer. Start with dots of foundation on the face’s center and blend outward using a foundation brush or sponge for a natural look. The key is to use a small amount and build up if needed. For concealer, focus on problem areas like under the eyes and blemishes. Dab gently to blend without spreading the product too thin.
Step 4: Set Your Makeup
To ensure your foundation and concealer stay put, apply setting powder with a brush or puff. Focus on oil-prone areas to keep shine at bay throughout the day. For a long-lasting, airbrushed effect, consider the “baking” technique by letting the powder sit on your skin before dusting off the excess.
Step 5: Contouring for Dimension
Contouring adds depth and definition to your facial features. Beginners should opt for powder contour as it’s forgiving and easy to blend. With an angled brush, apply contour under the jawline, cheekbones, and hairline. Use gentle strokes to avoid harsh lines. Highlighter can be added to the tops of cheekbones, brow bones, and the nose bridge for a luminous effect.
Step 6: Add Color with Bronzers and Blush
Choose a bronzer a shade or two darker than your skin tone to bring warmth to your complexion. Using a fluffy brush, blend it along your hairline, under cheekbones, and on your jawline, drawing a subtle “3” shape on each side of the face. For blush, pick a shade that enhances your natural undertone and apply it to the apples of your cheeks. Smile to find the roundest part and blend upward for a natural flush.
Following these steps will not only enhance your appearance but also help you develop a personalized makeup routine that highlights your best features.
Eight Beginner-Friendly Steps to Applying Makeup
Getting started with makeup doesn’t have to be overwhelming. Here’s a step-by-step guide to help you master the basics and achieve a beautiful, natural look.
1. Prepare Your Skin
Before applying any makeup, ensure your skin is clean and moisturized. This essential step helps your foundation lay smoothly and stay put throughout the day. Well-prepped skin creates the ideal canvas for makeup application.
2. Apply Primer
Choose a primer based on your skin type—there are different formulas for oily, dry, and combination skin. Apply a thin layer to key areas like your forehead, cheeks, and chin to help your makeup last longer and appear smoother.
3. Use Foundation and Concealer
Once your skin is prepped and primed, it’s time for foundation. Start by dabbing a small amount on your T-zone (forehead, nose, cheeks, chin) and blend outward with a foundation brush for a natural finish. Afterward, apply concealer to specific areas like under the eyes and any blemishes. Pat it in gently for a seamless look.
4. Set with Powder
To lock in your base, use a setting powder. Lightly press it onto your skin in areas prone to oil and shine, such as your T-zone. This will help prevent your makeup from moving or fading throughout the day. For a more polished look, consider trying the “baking” technique.
5. Add Contour and Highlight
Contouring adds depth and dimension to your face. Use a contour product (powder is easiest for beginners) along your jawline, under cheekbones, and near the hairline. Follow up with a highlighter on top of your cheekbones, the bridge of your nose, and other high points to add a radiant glow.
6. Bring Back Color with Bronzer and Blush
To achieve a sun-kissed glow, apply bronzer where the sun would naturally hit. Use a fluffy brush in a number three pattern: around your hairline, onto your cheekbones, and down to your jawline. Add blush to the apples of your cheeks, blending upwards for a hint of color.
7. Perfect Your Eye Makeup
Select an eye makeup look based on the occasion, whether you’re going for a simple day look or a night-time smokey eye. Essentials like eyeshadow, eyeliner, and mascara will help you achieve the look you desire. Remember to groom and define your brows with pencils or powders, filling in sparse areas and keeping them in place with brow gel.
8. Finish with Lip Products
Complete your makeup with lipstick or gloss. Start by lining your lips with a lip liner either in your natural shade or one slightly darker to add definition. Fill in with your chosen lipstick color, ensuring you blend the liner with the lipstick for a natural finish.
By following these steps and practicing regularly, you’ll find a routine that enhances your features and boosts your confidence. Remember, makeup is an art and a form of self-expression, so feel free to experiment until you find what suits you best.
Navigating the Makeup Maze: A Beginner’s Guide
Standing in front of the makeup aisle, it’s easy to feel like you’re swimming in a sea of choices. But how does a beginner make sense of all these options?
Understanding the Basics
- Purpose of Each Product: Start with recognizing the essentials. Foundations even out skin tone, concealers cover blemishes, and blush adds a pop of color. These are the building blocks of any basic makeup routine.
- Key Differences: Know the difference between similar products. For instance, an eyebrow pencil allows for precise definition, while an eyebrow gel holds hairs in place, offering a fuller, more natural look. Understanding these nuances can help you make informed choices.
Keeping It Simple
- Do You Need Everything?: When starting out, simplicity is key. You don’t need every trending product on the market. Focus on core items that enhance your natural beauty and learn to use them effectively. As you grow more comfortable, you can experiment with bronzers, contours, and highlighters.
- Tailored Guidance: Not every product suits every skin type or tone. Pay attention to recommendations based on your specific needs. Whether it’s a matte foundation for oily skin or a hydrating primer for dry skin, selecting the right products makes all the difference.
Resources and Learning
- Educational Content: Utilize tutorials and beauty blogs. Look for beginner-friendly videos and articles that break down techniques step-by-step. This will help make complicated processes like blending eyeshadow or applying eyeliner more approachable.
- Practice and Patience: Mastery takes time. Don’t be disheartened by initial setbacks. Practice consistently and adapt tutorials to suit your unique characteristics and preferences.
Navigating the overwhelming world of makeup is about understanding what works for you, starting with the basics, and gradually expanding your toolkit as you become more confident. Remember, makeup is ultimately a form of self-expression, so enjoy the journey!
Avoiding Makeup Creasing and Balancing Skin Texture
Tips to Prevent Makeup Creasing:
- Start with a Primer: Applying a high-quality primer is crucial. It creates a smooth base for your makeup, helping to fill in fine lines and pores, which in turn prevents creasing.
- Use Lightweight Formulas: Opt for lightweight foundation and concealer, preferably with a buildable finish. Heavy products tend to settle into expression lines more easily.
- Set with a Loose Powder: A light dusting of loose setting powder, especially around the eyes and any creasing-prone areas, can lock everything in place. Use a small brush for precise application.
- Less is More: Apply thin layers of product. If needed, build them up gradually. Thick layers can lead to creasing more quickly.
Making Dry Skin Appear Hydrated:
- Hydrate Before Application: Prioritize skincare by using a rich moisturizer and hydrating serum. A well-moisturized face provides a plump canvas for makeup.
- Choose Dewy Foundations: Dewy or luminous foundations give a glow to the skin, mimicking natural hydration and enhancing a fresh appearance.
- Cream-Based Products: Use cream blushes and highlighters instead of powders. They blend seamlessly with dewy foundations and nourish dry skin.
- Finish with a Hydrating Mist: A facial mist or setting spray with hydrating properties can lock in moisture and keep your skin looking supple throughout the day.
Making Oily Skin Appear Matte:
- Mattifying Primer is Key: Before applying makeup, use a mattifying primer. It helps control oil production and extends the wear of your foundation.
- Opt for Matte Foundations: Choose a foundation with a matte finish. These are specifically designed to minimize shine and offer long-lasting coverage.
- Blotting Papers for Quick Touch-Ups: Throughout the day, oil can break through. Keeping blotting papers handy helps absorb excess oil without adding more product.
- Powder Compact on-the-Go: A translucent powder compact allows quick touch-ups to maintain a matte look, especially for those midday T-zone shine emergencies.
By following these expert tips, makeup beginners can effectively manage creasing and balance their skin’s appearance for a flawless application every time.
Unlocking the Perfect Foundation Match
Foundation is the core of any makeup routine. Choose one that matches both your skin tone and type, whether it’s liquid, powder, or cream.
- Skin Type Compatibility
If you have oily skin, consider oil-free, mattifying foundations, while those with dry skin should look for hydrating, dewy formulas. Test shades on your jawline to find the closest match. - Application Techniques
Use a damp beauty blender or brush for a more airbrushed look, blending from the center of your face outward for even coverage.
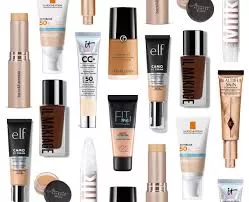
Top 20 Make-up Foundations Available on Amazon
Looking for the perfect make-up foundation can be overwhelming with so many brands and options available. To make it easier, we’ve compiled a list of 20 highly-rated make-up foundations available on Amazon. Whether you’re looking for full coverage, a dewy finish, or a foundation perfect for sensitive skin, this list has it all! Top-Rated Make-up…
Achieving Flawless Coverage: Foundation and Concealer Tips
Wondering how to perfect your makeup base? Let’s dive into the proper sequence and technique for applying foundation and concealer, leaving you with an effortlessly smooth complexion.
Step 1: Foundation
- Start with the Foundation:
- Apply a few dots of foundation on your T-zone: forehead, nose, cheeks, and chin.
- Opt for a foundation brush for blending—this method is swift and ideal for both beginners and anyone wanting a streamlined routine. However, a makeup sponge or even fingertips can work well for personal preferences.
- Blend Technique:
- Begin with a small amount of foundation to maintain a natural look. Blend the product outward and upward.
- This method ensures even coverage without a cakey finish.
Step 2: Concealer
- Next, Apply Concealer:
- Focus on areas needing extra coverage: under the eyes, around the nostrils, and any blemishes or dark spots.
- Use a dabbing motion instead of dragging. This technique helps the concealer to blend seamlessly without disturbing the foundation layer beneath.
- Application Tools:
- Use your ring finger, a concealer brush, or a sponge for precise application.
- Under-Eye Brightening:
- For under-eye areas, create two inverted triangles under your eyes and gently blend the edges into the foundation. This not only conceals but also illuminates the face, giving you a radiant glow.
By following this order and technique, your makeup will have a flawless and luminous finish, catering to both coverage and a natural glow.
How to Book Your Free Shade Matching Consultation
Are you struggling to find your perfect shade? We’ve got you covered with a free shade matching consultation that’s both quick and convenient. Here’s how you can book your complimentary 15-minute virtual session:
- Visit Our Website: Navigate to the consultation section on your preferred makeup brand’s website. Brands like Sephora, Ulta, or MAC often offer virtual consultations.
- Select ‘The Artist Consultation’: Look for the option called “The Artist Consultation” or a similar service that provides expert advice tailored to finding the right shade for you.
- Schedule Your Session: Choose a date and time that suits your schedule. Most services offer a user-friendly calendar for easy booking.
- Receive Confirmation: After booking, you’ll receive an email confirmation with details about your consultation, including a link for the virtual meeting.
- Prepare for the Session: Make the most of your 15 minutes by gathering any current makeup products or information about your skin tone you may have. This will help the expert provide tailored recommendations.
Ready to discover the perfect shade for you? Book your consultation now and enjoy a personalized and convenient experience!
Adding Depth and Definition: Contouring and Highlighting
Contouring Techniques for Every Face Shape
Contouring can reveal a more defined, sculpted look by playing with shadows and light.
- Choosing the Right Products
Powder contour works well for oily skin, while cream contour offers a more natural finish. Opt for shades only 1-2 tones darker than your foundation. - Placement Matters
For a heart-shaped face, focus on the temples and jawline. For round faces, contour under the cheekbones and along the jawline.
Makeup Routine: Highlighting for That Perfect Glow
Highlighting adds radiance and brings dimension to your face. A highlighter can be used on the high points of your face, like the cheekbones, nose bridge, and brow bones.
- Cream vs. Powder
Cream highlighters offer a subtle, dewy finish, while powder highlighters provide a more intense glow.
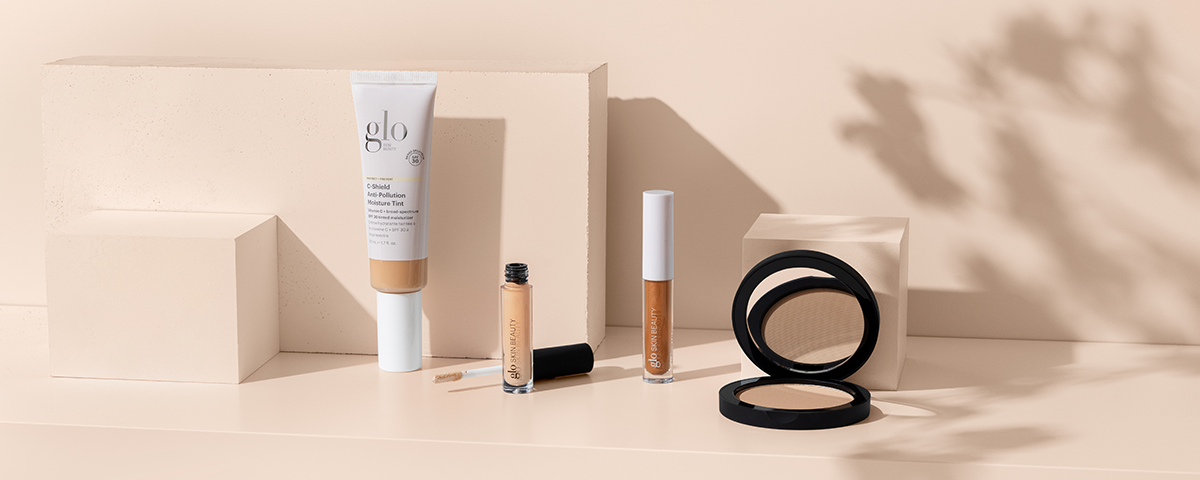
Hybrid Skincare-Makeup Products: The Perfect Blend of Beauty and Skin Benefits
Achieve Flawless Skin with Hybrid Skincare-Makeup Products Beauty is blending the lines. These days, it’s getting harder to tell where skincare ends and makeup begins. People want more from their products, so beauty brands are creating amazing new hybrids that do double duty. These clever products give you flawless coverage while also treating your skin.…
How to Add Color Back to Your Face with Bronzer and Blush
Adding color back to your face with bronzer and blush can enhance your natural beauty and give you a radiant, sun-kissed glow. Here’s a step-by-step guide to help you achieve that perfected look.
Choosing the Right Bronzer
Select a bronzer that’s only a shade or two darker than your natural skin tone. This ensures a warm, yet natural effect. Once you’ve found the perfect shade, you’re ready to apply.
- Application Technique: Use a fluffy brush to apply bronzer for a soft, diffused look. Picture the number three on your face. Start at your hairline, sweep it down to your cheekbones, and then finish on your jawline. This technique ensures an even application that mimics a natural tan.
- Blending: Employ circular, sweeping motions with your brush. This helps blend the bronzer and creates a seamless transition. Don’t forget to dust a little on the bridge of your nose for that complete sun-kissed finish.
Selecting the Perfect Blush
When it comes to blush, choose a shade that complements your skin’s undertones. Warm undertones might look great with peach or coral, while cool undertones can shine with pink or plum hues.
- Where to Apply: Focus on the apples of your cheeks — the roundness when you smile. This adds a youthful flush to your face.
- Technique: Smile while applying, and gently dust the blush onto your cheeks with a brush. Use circular motions to blend upwards along your cheekbones, which helps achieve a natural, lifted appearance.
By following these tips, you can effortlessly add color back to your complexion with bronzer and blush, enhancing your features with a healthy, vibrant glow.
Understanding the Difference Between Blush and Bronzer, and How to Apply Them
Blush and bronzer, though often used interchangeably, each play unique roles in enhancing your makeup look. Let’s break down their differences and explore some application tips.
Blush vs. Bronzer: Key Differences
- Purpose:
- Blush is designed to add a pop of color to your cheeks, mimicking a natural flush. It’s perfect for bringing life and warmth to the center of your face.
- Bronzer, on the other hand, provides a sun-kissed glow and helps define your features. It enhances the natural contours of your face without shifting to the shadows like contour products do.
- Formulas:
- Both products are available in various forms: liquids, creams, and powders. Your choice depends on your skin type and the finish you desire.
Application Tips for Blush and Bronzer
Blush Application:
- Placement: Apply blush to the apples of your cheeks, starting from the center and blending outward towards your temples.
- Technique: Use a brush or a damp sponge for a seamless finish. Circular motions help blend the product into your skin naturally.
- Amount: Start with a small amount and build up the intensity gradually to achieve a natural look.
Bronzer Application:
- Placement: Focus on areas where the sun naturally hits your face: forehead, cheekbones, and jawline. Another popular method is the “3” shape, starting from the forehead, swooping down to the cheekbone, and ending along the jawline.
- Technique: A fluffy brush works best for a light, even application. Use sweeping motions to blend and avoid harsh lines.
- Amount: Less is more; it’s easier to add product than to remove it. Build the depth gradually to maintain a natural appearance.
By understanding these subtle differences and mastering the application techniques, you can effectively use blush and bronzer to elevate your makeup routine and enhance your natural features.
As a makeup beginner, you might wonder if contouring and applying bronzer are both necessary steps in your routine. Understanding their distinct roles can help you make an informed decision.
Contouring vs. Bronzing
Contouring is all about creating shadows on your face to enhance and sculpt its natural shape. It’s your go-to technique if you want to define areas like your cheekbones, jawline, or nose. On the other hand, bronzer is used to give your skin a warm, sun-kissed glow. It highlights your facial features, making them look naturally vibrant, especially if your skin is lighter or dull during certain seasons.
Options and Application
- Contour Products: Typically available in cream or powder form, contouring products require precision and blending. Beginners might find it useful to start with a contour stick, which allows more control.
- Bronzer Products: These come in liquids, creams, and powders. Powders are generally easiest for beginners because they blend seamlessly and are forgiving. You can even find bronzers from well-known brands like Maybelline and NYX.
Do You Need Both?
You don’t have to use both contour and bronzer, especially if you’re new to makeup. If you’re just starting out, consider focusing on one technique. Bronzer is generally more versatile and can double-up to create subtle definition while adding warmth to your complexion.
Getting Started
If the idea of contouring seems daunting, start with bronzer. A simple sweep along the perimeter of your face and onto your cheeks can enhance your natural features with minimal effort. Once you’re comfortable, you can experiment with contouring for more definition.
Choosing what works best for you depends on the look you’re aiming for and how much time you want to invest in your makeup routine. Remember, makeup is all about personal expression and having fun, so explore and adapt as you go!
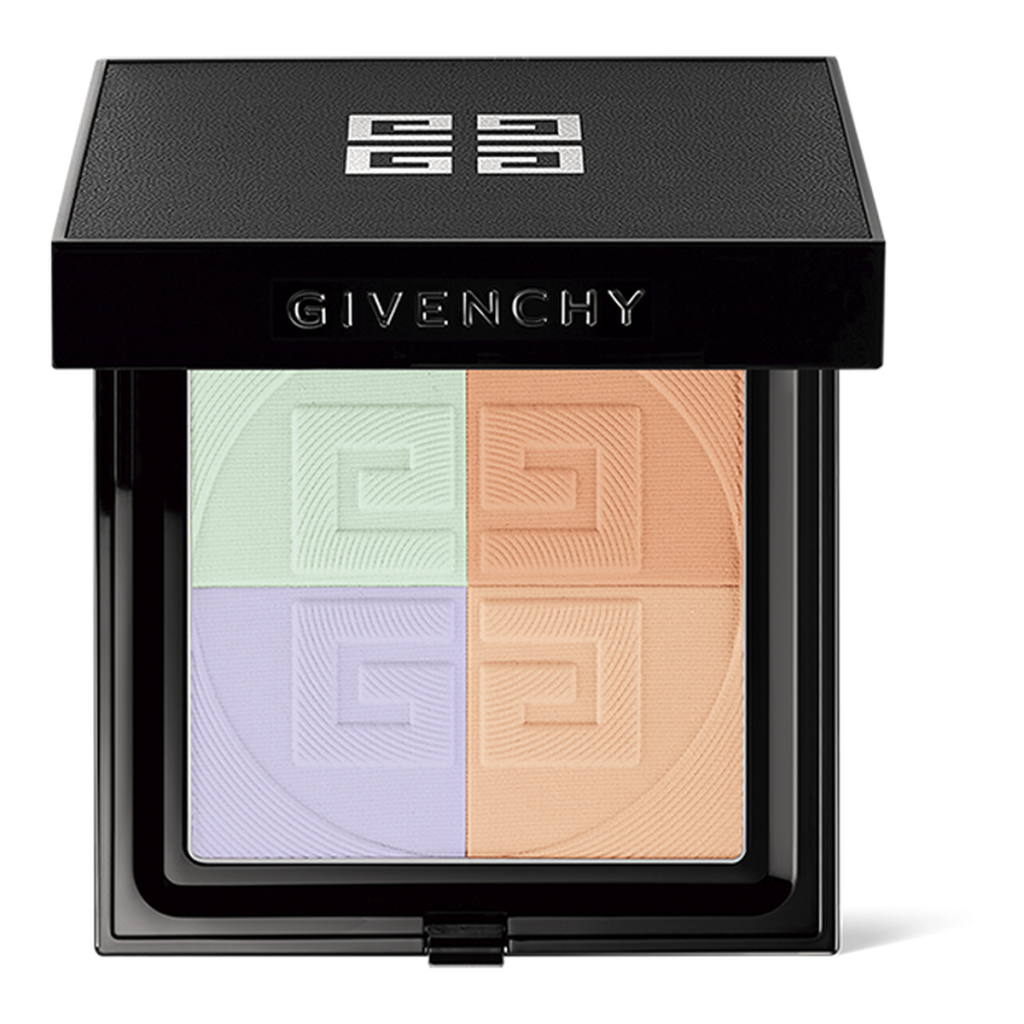
Mattifying & Blurring Setting Compact Powder
A finishing powder combining 4 complementary colors for a unified, blurred and lasting matte finish that leaves the complexion looking radiant.
5 shade(s)
Enhancing Eyes and Lips for a Balanced Look
Creating Eye Makeup that Pops
Eyes are often the focal point of any look. Eye makeup techniques can enhance natural beauty, whether through subtle looks or dramatic finishes. But what should be considered when applying eye makeup for different occasions? The key is to tailor your approach to match the event and your mood.
Consider Your Occasion
- Eyeshadow Tips
Start with a neutral base. Build dimension with darker shades in the crease and lighter shades on the lid. A touch of shimmer can add brightness to the inner corner, perfect for a day look or to complement a casual outfit. - Eyeliner for Definition: Choosing the Right Eyeliner for Your Look
- Eyeliner is a versatile tool used to define your eyes, enhance their shape, and create a variety of looks. Whether you’re going for a subtle enhancement or bold drama, the type of eyeliner you choose can make all the difference.
- Gel Eyeliner: Perfect for creating smooth, precise lines. It’s ideal for a polished look and works well for long-lasting wear.
- Liquid Eyeliner: Best for achieving sharp, clean lines and dramatic cat-eyes. Its precision can make your eyes appear larger and more expressive.
- Pencil Eyeliner: Great for a softer look. Use it for tightlining or smudging to add depth without the intensity of a liquid liner.
- Mascara for Full Lashes
Choose a volumizing or lengthening mascara, depending on your lash needs. Wiggle the wand at the base of the lashes to add volume without clumping. This technique is versatile and can enhance any look, from subtle to dramatic.
Tailor Your Look
Depending on where you’re headed and what you plan on wearing, you can adjust your eye makeup to match your mood. Whether it’s enhancing your natural beauty for a professional setting or going bold for a night out, the choice is yours.
Choosing Lip Colors for Every Occasion
The right lip color can tie together your entire look. From subtle nudes to vibrant reds, consider your skin tone, the occasion, and personal preference.
- Finding Your Shade
Warmer skin tones suit orange-based reds and nudes, while cooler skin tones shine in blue-based reds and pinks.
Versatile Makeup for Any Event
Makeup isn’t just about choosing the perfect lip color; it’s about creating a cohesive look that suits any occasion. Whether you’re going for a natural daytime appearance or a bold evening look, understanding how to adjust your application is key.
- Natural Daytime Look
Opt for light foundation, soft eyeshadows, and a touch of mascara. Pair with a nude or soft pink lip for a fresh, awake appearance. - Dramatic Evening Look
Amp up the intensity with smoky eyes and defined brows. A deep red or berry lip can add sophistication and drama.
For those who want to explore these looks further, consider online video tutorials from your favorite beauty influencers. These resources offer step-by-step guidance and inspiration, helping you master the art of transformation with ease.
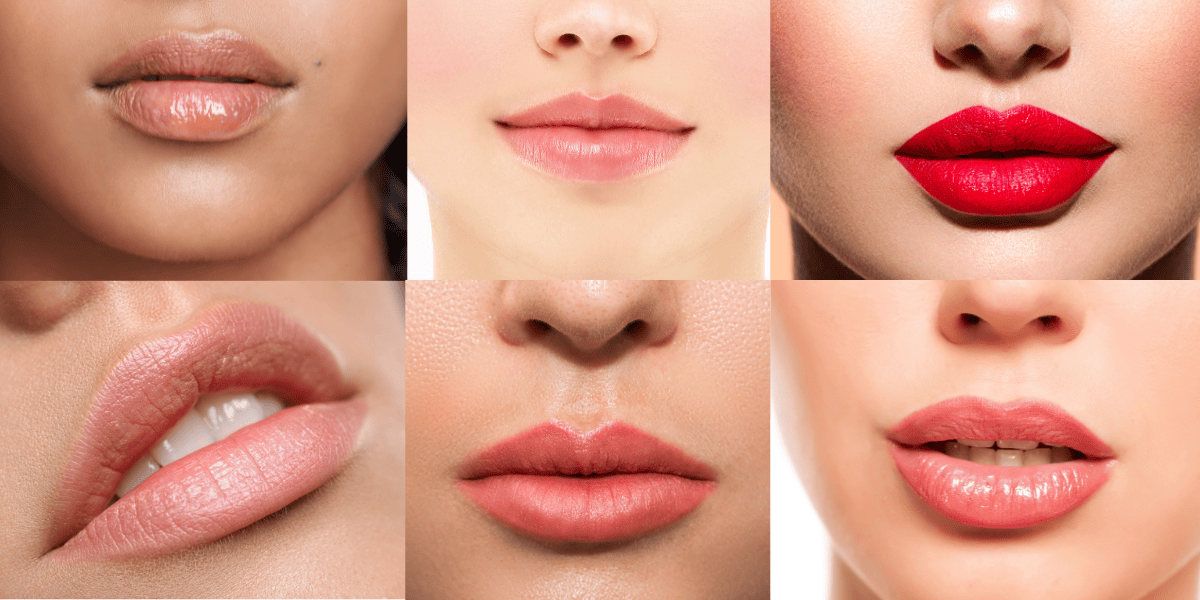
How to Perfect a Natural Lip Look Using Rom&nd Lip Pencil and BLK Lip Treatment Oil
Steps to Achieve a Polished Lip Look
Achieving a polished lip look requires a few careful steps. Here’s how to perfect your pout with just the right touch:
- Prep Your Lips
Begin with a clean base. If you prefer, use a lip primer to ensure a smooth application and long-lasting wear. - Outline with Lip Liner
Select a lip liner that closely matches your lipstick shade. Gently outline your lips, adjusting the contour slightly beyond your natural line for a fuller appearance, if desired. - Fill in with Lip Liner
After outlining, fill in your lips with the same liner to create a solid foundation. This helps in evenly distributing color and enhancing the durability of your lipstick. - Apply Lipstick
Using the lip liner as a guide, apply your lipstick evenly across your lips. This step can be done directly from the tube or with a lip brush for more precision. - Finalize Your Look
For added depth and shine, consider topping your lipstick with a gloss. Alternatively, blot with a tissue for a matte finish.
With these steps, you’ll achieve a polished lip look that’s both stunning and lasting. For further expertise, explore additional resources and techniques to refine your skill.
How to Achieve Various Eyebrow Looks with Different Products
When it comes to perfecting your eyebrows, selecting the right product can make all the difference in achieving your desired look. Here’s a quick guide to help you navigate the options:
1. For a Natural Appearance:
Opt for a brow pencil. Its fine tip allows you to draw hair-like strokes, mimicking your natural brows. This technique is ideal if you’re looking to define your brows subtly and effortlessly.
2. To Fill Sparse Areas:
Brow powder is your best friend. Use it to fill in any gaps, creating a fuller appearance. The soft texture of the powder blends smoothly with your brows, ensuring coverage without harsh lines.
3. To Tame and Shape:
Consider a brow gel. Perfect for managing unruly hairs, it provides hold and comes in both tinted and clear versions. Tinted gels can add a bit of color, while clear gels focus purely on maintaining shape throughout the day.
Combining Products for Dimension
For those seeking a more enhanced look, combining products can add dimension and longevity. Try using a pencil to define the shape first, then layer it with brow powder for added depth. Finish with a gel to set everything in place and enjoy a polished, long-lasting brow.
Experiment with these tools to discover what works best for your brow needs. By mixing and matching, you can tailor your routine to achieve anything from a natural look to a more defined style.
Mastering Lip Products: Tips for Effective Use
Lip products can transform your look and enhance your lips’ natural beauty. Here’s how to use lip primer, lip pencil, lipstick, and lip gloss to achieve the best results:
Lip Primer: The Foundation
A lip primer is essential for locking in your lip products and ensuring longevity. Applying a thin layer before any other lip product creates a smooth base, helping your lipstick or gloss stick around for hours. This initial step can prevent your chosen shade from feathering and fading throughout the day.
Lip Pencil: The Sculptor
To define and shape your lips, start with a lip pencil. Carefully outline your lips, establishing a precise boundary that prevents the lipstick from bleeding. If you desire a plumper look, subtly over-line just beyond your natural lip line. Contouring with a slightly darker shade can further enhance the volume of your pout.
Lipstick: The Color Play
Lipstick not only colors your lips but also accentuates their shape and fullness. With options from satin to matte, you can pick a finish and shade that suits your mood and occasion. For a lasting application, use a lip brush to apply and blot with a tissue between layers. This technique builds intensity and ensures the color stays vibrant longer.
Lip Gloss: The Finisher
Lip gloss adds a lustrous shine to your lips, available in everything from sheer to bold hues. To apply effectively, use the included applicator for initial placement, then gently blend with your fingertip. This method prevents the gloss from becoming too sticky and distributes it more evenly across your lips. Whether worn alone or over lipstick, gloss completes your look with a luscious finish.
By integrating these steps into your makeup routine, you can make the most of your lip products and achieve a flawless result every time.
Essential Eye Products for Makeup Beginners
Starting with eye makeup can be both exciting and overwhelming. To simplify your journey, here are a few must-have products and tips on how to use them effectively:
Primer for Longevity
Eyeshadow Primer: A dedicated eyeshadow primer is crucial. Unlike general face primers, these are specifically formulated to help your eyeshadow resist creasing and fading. Use a small amount, applying it evenly across your eyelids to ensure your eye makeup lasts throughout the day.
Add Color and Dimension
Eyeshadow: Eyeshadow comes in powders and creams, offering shades that range from subtle mattes to vibrant shimmers. As a beginner, start with a neutral palette, which can be used for both everyday and dramatic looks. Apply lighter shades on the brow bone, medium shades on the lid, and darker hues in the crease for dimension.
Define Your Eyes
Eyeliner: Eyeliner is key for defining and enhancing the shape of your eyes. Opt for a simple pencil liner to begin with—it’s easy to control and forgiving if mistakes occur. As you gain confidence, experiment with gel or liquid liners for a more defined look. A thin line along the lash line can make the eyes pop, while a soft smudge can add depth.
Enhance Your Lashes
Mascara: A quality mascara can transform your look by thickening, lengthening, and darkening your lashes. Choose a formula that suits your desired effect—whether that’s volume, length, or definition. Apply from the base of your lashes to the tips, wiggling the wand gently to avoid clumps.
Mastering these essential products will lay a strong foundation for your makeup skills. Remember, practice is key, so don’t be afraid to experiment and find what works best for you!
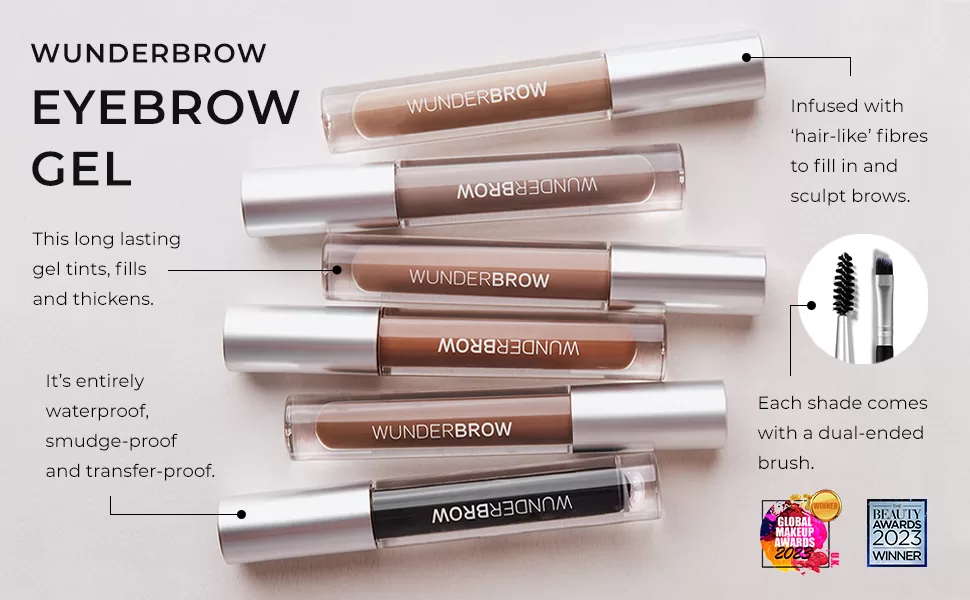
Differences Between Eyebrow Gel, Pencil, and Powder
When it comes to shaping and defining your eyebrows, there are three main tools to choose from: eyebrow gel, pencil, and powder. Each serves a unique purpose and offers different results, so let’s dive into what sets them apart.
Eyebrow Gel
Eyebrow gel is ideal for taming unruly eyebrow hairs. It works like a styling product for your brows, helping them stay in place throughout the day. These gels come in clear formulations, which are great for a natural look, as well as tinted options that can add a touch of color. Whether you’re going for a barely-there look or need extra hold, there’s a gel to match your needs.
Eyebrow Pencil
Perfect for precision, the eyebrow pencil allows you to draw individual hairs, creating a finish that closely mimics your natural brows. This tool is excellent for those looking to fill in sparse areas with realistic strokes. The fine tip and waxy texture help blend seamlessly, offering the most control and natural appearance.
Eyebrow Powder
Eyebrow powders are fantastic for beginners or those who prefer a softer, more diffused look. They easily fill in thin spots and can be layered to achieve varying intensities. Interestingly, if you’re in a pinch, eyeshadow can double as eyebrow powder. Just ensure the shade complements your natural brow color for the best effect.
In summary, choose eyebrow gel for holding and taming, the pencil for precision and detail, and powder for a gentle, beginner-friendly fill.
Understanding the Differences Between Eyebrow Pencil and Eyebrow Gel
When it comes to achieving perfect brows, choosing between an eyebrow pencil and an eyebrow gel can make a significant difference in your look. Both tools serve unique purposes and are used in different ways to enhance your natural beauty.
Eyebrow Pencil: Precision and Natural Finish
An eyebrow pencil is your go-to tool for precise application. With its fine tip, you can effortlessly mimic the appearance of real eyebrow hairs. This allows you to fill in sparse areas with tiny strokes, creating a natural and realistic finish. The waxy texture of the pencil also helps it adhere well to the brow, contributing to a fuller and more defined look.
How to Use an Eyebrow Pencil:
- Select the Right Shade: Pick a pencil shade that closely matches your natural brow color for the most authentic results.
- Create Hair-Like Strokes: Start by lightly drawing short, upward strokes that mimic the direction and growth of your natural brow hairs.
- Blend for Softness: Use a spoolie brush to blend the strokes, ensuring a seamless and soft finish.
Eyebrow Gel: Holding Brows in Place
Eyebrow gel is ideal for setting your brows after shaping and filling them in. It acts like a setting spray for your brows, keeping hairs in place throughout the day. Available in clear or tinted formulations, it can add extra definition or simply keep your brows tidy and groomed.
How to Use an Eyebrow Gel:
- Apply After Shaping: Once your brows are filled in with a pencil, brush on the gel starting from the inner corner outwards.
- Define and Set: For a bold look, opt for tinted gel; for a natural appearance, clear gel is the best choice.
- Secure the Shape: As you apply, gently sweep the brush in the direction of hair growth to lock in the shape.
By mastering the use of both an eyebrow pencil and gel, you can ensure your brows are not only filled in but also neatly styled and long-lasting. Whether you desire a full, dramatic brow or a subtle enhancement, these tools allow for versatile and personalized brow grooming.
Setting Your Look: The Final Steps
How Setting Powder and Spray Make a Difference
The final step in your makeup routine is ensuring it lasts all day. Here’s how you can effectively set your makeup base for a flawless finish:
- Setting Powder
For those with oily skin, a translucent setting powder can lock in foundation and prevent shine. Start by swiping a brush or velvet puff into your setting powder, then tap it to remove any excess. Lightly dust it over areas prone to oiliness, such as the T-zone. Press the powder into your skin to ensure you don’t move your makeup around during application. This technique helps to keep your look intact throughout the day. - Focus on Key Areas
Pay special attention to areas that often need a touch-up, like the T-zone. Applying setting powder here can help maintain a matte finish and prevent midday shine. - Advanced Techniques
If you have a special occasion or desire an airbrushed finish, consider “baking” your makeup. This involves applying a generous amount of setting powder and letting it sit for several minutes before dusting off the excess. This method can enhance the longevity and smoothness of your makeup. - Setting Spray for Longevity
A setting spray helps blend makeup together, creating a more seamless finish. It also helps keep your makeup looking fresh, especially in warmer weather or during long events. Simply spritz over your face after applying the powder to lock everything in place.
By following these steps, you can ensure your makeup not only looks great initially but stays put throughout the day.
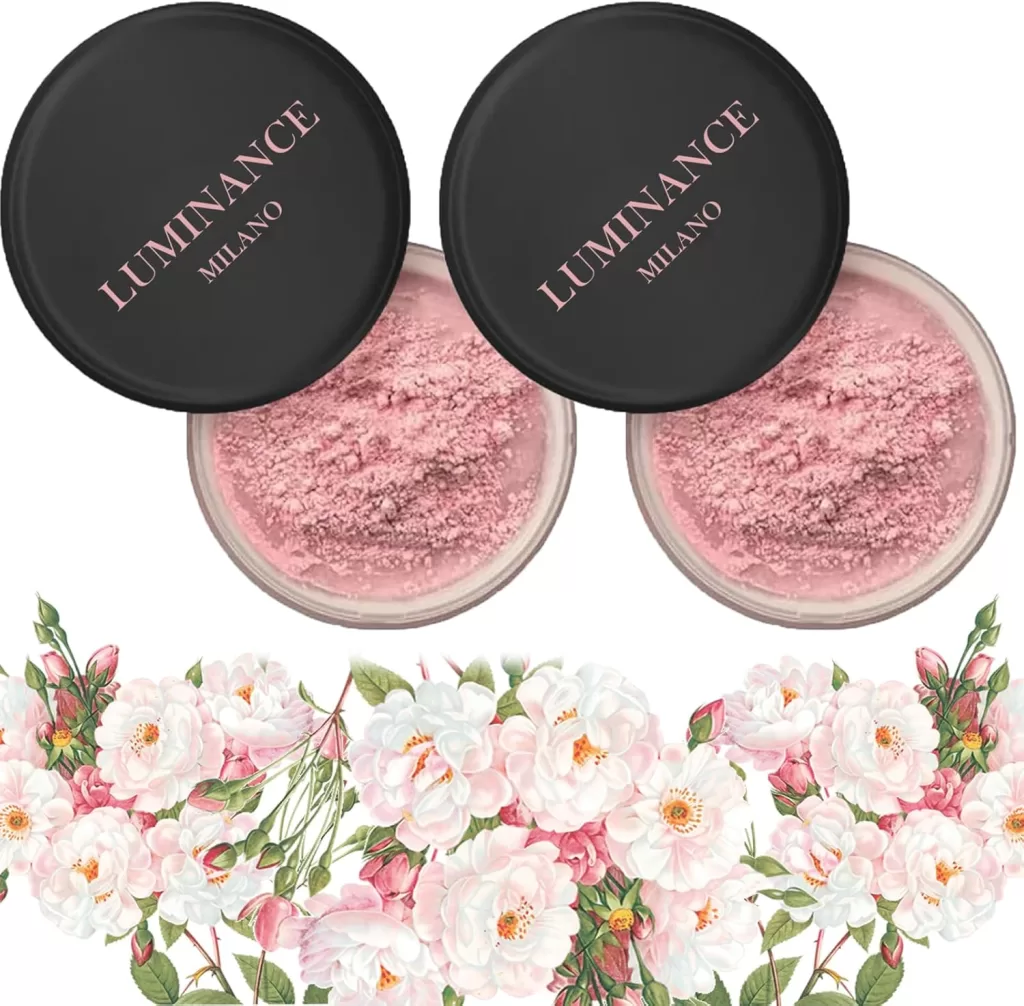
Luminance Milano Pink Powder, Luminance Milano Setting Powder, Blurring Setting Powder By Luminance Milano, Beauty Blurring Powder, Waterproof Setting…
Advanced Tips for Personalizing Your Makeup Routine
Creating a personalized makeup plan involves a blend of understanding your unique features and following a structured process to ensure the best results.
Step-by-Step Personalization Process
- Select Your Package: Begin by choosing a makeup package that aligns with your needs and preferences.
- Submit Your Details: After purchase, you’ll receive a link to upload a headshot and fill out a form detailing your specific makeup concerns. This step is crucial as it allows for the collection of personalized data.
- Customization and Guidance: With your information, experts will curate a selection of products and colors tailored to your skin tone and preferences. You’ll receive a customized guide explaining how and where to apply each product for maximum effect.
- Receive and Learn: Your personalized kit, along with access to a series of instructional videos, will be shipped to you. These resources provide you with step-by-step tutorials to perfect your application technique.
Understanding Skin Undertones
Knowing your skin’s undertone helps in selecting the most flattering colors. Whether warm, cool, or neutral, choosing makeup that complements your undertone enhances your overall look.
Adapting to Different Seasons
Your skin’s needs can change with the seasons. In winter, opt for more hydrating formulas, while in summer, consider lighter, oil-free options to prevent makeup from feeling heavy or clogging pores.
By following these steps and tips, you can create a makeup routine that not only suits your personal style but also adapts to your skin’s changing needs throughout the year.
Makeup Routine: Product Suggestions Table
| Step | Product Type | Recommendations |
|---|---|---|
| Primer | Hydrating, Mattifying | Smashbox Photo Finish, e.l.f Poreless Putty |
| Foundation | Liquid, Powder | Maybelline Fit Me, L’Oréal True Match |
| Highlighter | Cream, Powder | Becca Shimmering Skin Perfector, Fenty Beauty Killawatt |
| Eyeshadow Palette | Neutral, Bold | Urban Decay Naked, Morphe x Jaclyn Hill |
| Mascara | Volumizing, Lengthening | L’Oréal Lash Paradise, Too Faced Better Than Sex |
| Setting Spray | Dewy, Matte | Urban Decay All Nighter, NYX Matte Finish |
Smashbox Photo Finish Primer
Smashbox Photo Finish Primer is a popular makeup primer designed to create a smooth, flawless canvas for foundation. It helps minimize the appearance of pores, fine lines, and wrinkles, while also controlling shine and extending the wear of makeup.
e.l.f. Poreless Putty Primer
e.l.f. Poreless Putty Primer is an affordable primer that works to blur imperfections and minimize the appearance of pores. It has a putty-like texture that fills in pores and fine lines, creating a smooth base for foundation.
Maybelline Fit Me
Maybelline Fit Me is a popular makeup line known for its natural-looking, matte finish. It’s designed to provide medium to full coverage, helping to minimize the appearance of pores and control shine. The range includes foundations, concealers, and powders, all formulated to blend seamlessly with the skin.
L’Oréal True Match
L’Oréal True Match is a foundation line that aims to match your skin’s exact tone and undertone. It offers a wide range of shades to ensure a precise match. The formula is lightweight and provides buildable coverage, from sheer to medium. True Match is known for its natural, dewy finish and its ability to blend effortlessly into the skin. Sources and related content
Discover the Founder’s Favorite Products
When it comes to standout beauty products, the founder has carefully curated a list of must-haves:
- Ultimate Brush Collection
Transform your makeup routine with this high-end brush set. Perfect for achieving professional looks, its precision and craftsmanship are unparalleled. - Smoothing Foundation Primer
For a flawless base, this primer is essential. It preps your skin, ensuring a smoother foundation application and enhancing longevity. - Creamy Foundation Perfection
Embrace a radiant complexion with this luxurious cream foundation. Its buildable coverage is perfect for any occasion. - Glow-Enhancing Illuminator
Capture that lit-from-within glow with this pressed illuminator. It adds a touch of shimmer that beautifully enhances your natural radiance.
These handpicked items promise not only efficacy but a touch of luxury in your beauty arsenal.

Born to Glow Liquid Illuminator
Glow On!
Our lightweight liquid illuminator features a multifunctional formula that can be used as a foundation base or over cheekbones, décolletage, and cupids bow. The subtle shimmer gives you a natural-looking radiance. Available in four light-catching shades.
NYX Professional Make Up: Proud Artistry for All
Welcome to our fierce community. Where pro-level makeup is accessible for all, color and self-expression are never filtered, your way of doing it is always proudly celebrated and the bright side is always the right side. With love from Los Angeles.
Discover What’s Included in Our Customized Makeup Package
Step 1: Personalize Your Experience
After selecting your desired package, you’ll receive an email from us. This email contains a link for uploading your headshot along with a checklist to identify your specific makeup preferences and concerns. Simply upload your photo, mark the relevant boxes, and submit the form.
Step 2: Tailored Makeup Selection
With your personalized information in hand, our team curates a selection of products and shades that perfectly complement your features. We take into account everything you’ve shared to ensure each product enhances your natural beauty.
Step 3: Your Comprehensive Makeup Kit
- Customized Product Selection: Based on your chosen package, you receive all the products necessary for creating an effortlessly beautiful daily look.
- Step-by-Step Application Guide: Detailed instructions on how to apply your makeup, with insights into which product works best for each part of your face.
Step 4: Exclusive Video Tutorials
Gain access to our exclusive video series, tailored to your needs, whether you’re learning the basics or mastering advanced techniques. These videos provide thorough demonstrations to help you apply your makeup like a pro.
With a focus on your unique style and needs, this makeup package equips you with the essentials for crafting a flawless everyday look. Enjoy the convenience and confidence of a makeup routine designed just for you!
The core philosophy behind the design of these makeup products centers on inclusivity and expert craftsmanship. Created by skilled makeup artists, the aim is to provide high-performing solutions that cater to all skin types and tones. These products are crafted to combine professional quality with user-friendly application, ensuring that anyone—whether a beginner or a pro—can achieve stunning results. This approach promises not just performance but also accessibility, making it easier for individuals from every corner of the beauty spectrum to express themselves confidently. Brands like Fenty Beauty
, MAC
, and NARS embody this ethos by offering diverse ranges that enhance the beauty of everyone.
Customer Reactions to Our Makeup Products
High Praise from Long-Term Users
Many makeup enthusiasts have embraced our products and rave about their quality. Users frequently highlight their favorites, from skin primer to a seamless foundation that doubles as a finishing powder. Lip glosses and lipsticks are also adored, adding a pop of color with every application. Customers appreciate the tools too—brushes and palettes that deliver flawless results. They love discovering new seasonal releases that keep their makeup routines fresh and exciting.
Professional Endorsements in Editorial Circles
Our makeup line has earned its place at the top with professionals in the fashion and editorial industry. Makeup artists often reach for our products during high-stakes photo shoots, noting their reliability and performance. Talent scouts and editors are continually impressed by the professional-grade textures and shades we provide. One editor even mentioned transitioning to using our line almost exclusively, attesting to its top-tier quality and versatility.
In summary, both everyday users and industry professionals alike have responded enthusiastically to our makeup collection—citing exceptional quality as a key reason for their continued loyalty.
Meet Our Visionary Founder: Tara Cowles
Tara Cowles is the dynamic force behind our brand, juggling roles as a devoted wife, caring mother, and innovative entrepreneur. With her ever-stylish and poised demeanor, Tara is the embodiment of a modern, multifaceted leader.
Tara’s Vision
Her vision is simple yet powerful: to create high-performance, hassle-free products. Designed for the busy individual, her product line is crafted to seamlessly transition you from daytime activities, like soccer games, to evening indulgences, such as cocktails with friends. Tara is committed to delivering solutions that are as versatile and refined as the people who use them.
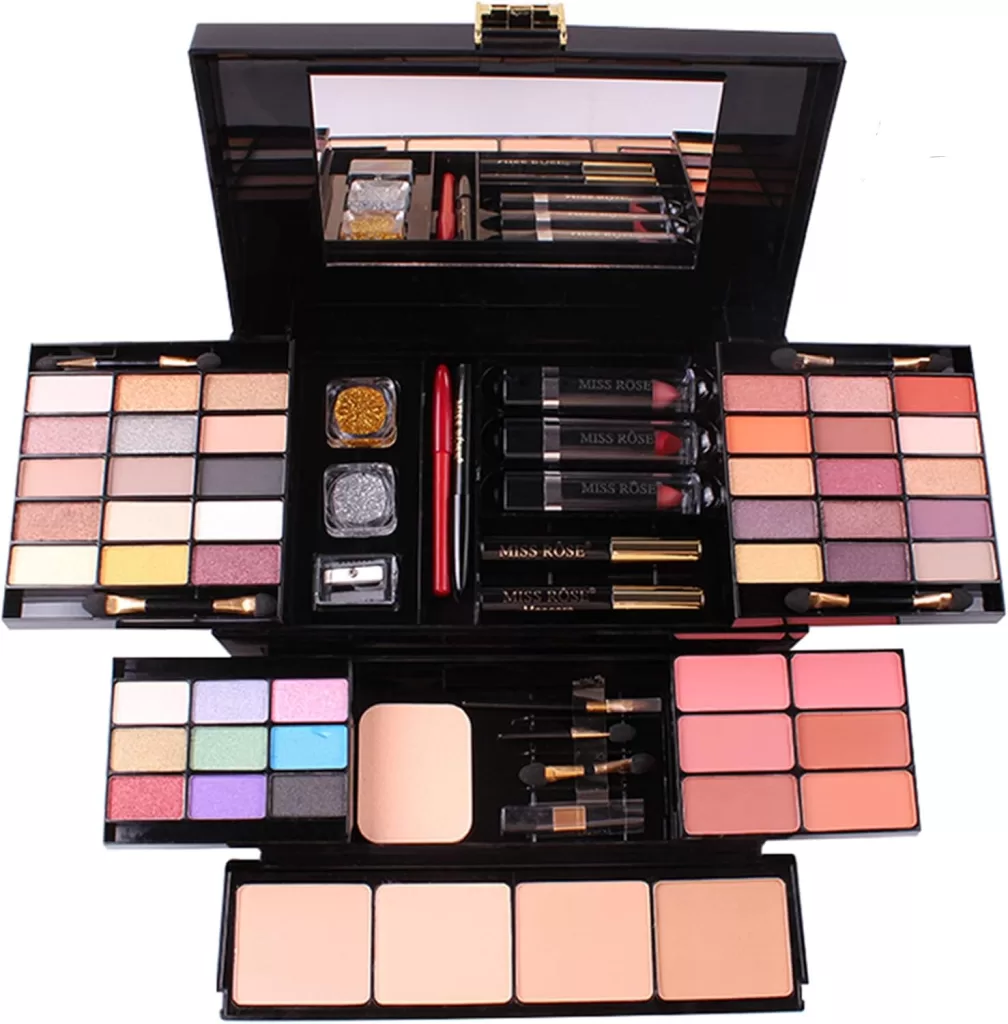
FantasyDay All-in-one Makeup Set Gift Surprise | Full Makeup Kit for Women Multipurpose Essential Starter Bundle Include Eyeshadow Palette Lipstick Blush…
What’s Extra in the Gold Package Compared to the Bronze?
When you upgrade to the Gold package, you’re not just getting a basic kit; you’re investing in a comprehensive beauty experience. Here’s a breakdown of the additional products you’ll receive in the Gold package:
Enhanced Collection:
- Full Makeup Kit: A complete set to fulfill all your makeup needs.
- Custom Makeup Guide: Tailored advice curated just for you.
- Exclusive How-To Video Series: Step-by-step tutorials to maximize your makeup skills.
Premium Product Additions:
- Foundation Primer: Prepares your skin for flawless application.
- Luminous Cream Foundation and Concealer: Achieve that perfect glow with these enriching formulas.
- HD Pressed Translucent Powder and Illuminating Powder: Sets your makeup while adding a radiant finish.
- Convertible Color Wand: Brings versatility to your look with a touch of color easy to apply.
- Complete Brow Kit: Includes Brow Pencil and Brow Setting Gel for perfectly shaped brows.
- Dual Action Highlighter Pencil: Adds dimension and brightness to your features.
- Eye Essentials:
- Eye Primer for long-lasting shadow wear.
- Two Eyeshadow Colors to mix and match.
- Waterproof Gel Eyeliner Pencil for defined lines.
- HD Volumizing Mascara for dramatic lashes.
- Lip Enhancers:
- Waterproof Gel Lip Liner Pencil for sharp, defined lips.
- Platinum Collection Lipstick for a luxurious finish.
Each piece elevates your routine, ensuring you’re covered from base to finish with top-tier beauty products. Dive into a more polished and professional look with these enhancements, exclusively available in the Gold package.
Discover the Bronze Package: Your Ultimate Makeup Kit
Are you ready to elevate your beauty routine? The Bronze package offers a thoughtfully curated selection of makeup essentials, tailored just for you. Here’s what you’ll find inside:
- Customized Makeup Guide: Receive personalized beauty advice that caters to your unique style and complexion.
- How-To Video Series: Access step-by-step tutorials to master each product and create your perfect look.
Key Products in the Bronze Package:
- Primer for a Flawless Base: Get your skin ready for foundation with a top-tier primer that ensures long-lasting wear.
- Luminous Cream Foundation: Enjoy a radiant finish with this creamy foundation that blends seamlessly with your skin.
- Illumination Concealer: Achieve that coveted bright-eyed look by effectively hiding imperfections with a light-reflecting concealer.
- HD Pressed Translucent Powder: Set your makeup with this high-definition powder that provides a smooth, shine-free finish.
- Illuminating Powder: Add a touch of glow to your cheeks and eyes with this versatile pressed powder.
- Eye Primer: Enhance eyeshadow longevity and vibrancy with an effective eye primer for a crease-free look.
- Convertible Color Stick: Infuse a pop of color into your cheeks and lips with this dual-purpose wand.
Elevate your beauty routine with the Bronze package’s essential products and guidance, making your everyday look effortlessly stunning.
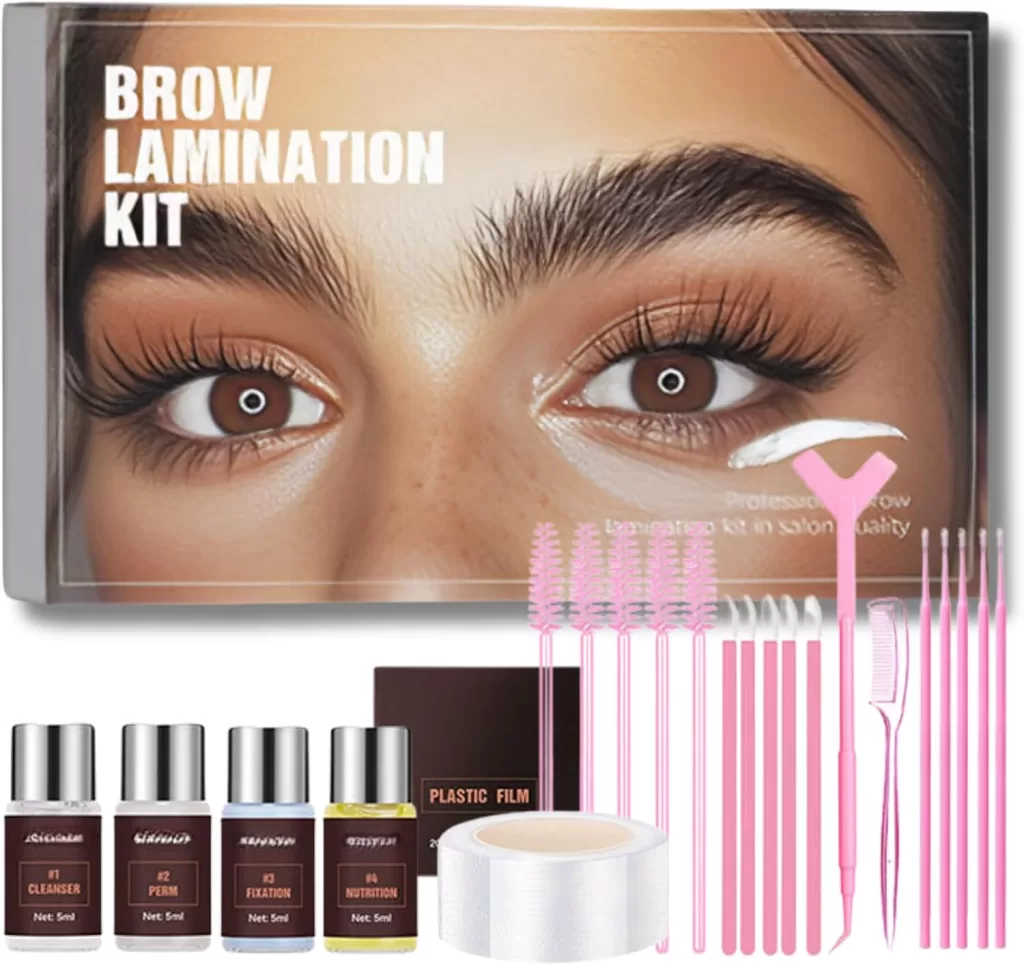
Brow Lamination Kit Premium Eyebrow Lamination Kit With Keratin Premium Eyebrow Lift Set Shaping For 3d Natural Fuller Thicker Wild Eyebrows 6 Weeks Long.
FAQs: Makeup Routine
Q: How do I choose the right foundation for my skin type?
A: Identify your skin’s needs first. For oily skin, select a matte, oil-free formula. For dry skin, a hydrating, dewy foundation is ideal.
Q: Should I use powder or cream contour?
A: Powder is best for oily skin as it provides a matte finish, while cream contour blends smoothly on dry or combination skin.
To watch the makeup tutorials offered by the company, follow these simple steps:
1. Access IGTV:
- Open the Instagram app on your smartphone or tablet.
- Navigate to the IGTV section, which can be found in the main navigation menu or by heading to the profile’s IGTV icon.
2. Search for Tutorials:
- Use the search bar to find the company’s official Instagram page, if you’re not already following them.
- Once on their profile, scroll through their IGTV videos.
3. Explore Video Content:
- Look for tutorials that guide you through various makeup styles, from natural looks to more dramatic effects.
4. Watch and Learn:
- Select a video and press ‘play’ to start learning from the tutorial.
- Each video is designed to tackle common makeup questions quickly and effectively, so you can apply the techniques right away.
With these tutorials, you can easily enhance your makeup skills at your own pace!

Conclusion: Makeup Routine
Perfecting your makeup routine doesn’t require countless products, just an understanding of what works best for you. Whether you’re aiming for a natural look or something more glamorous, these steps can help you achieve radiant, flawless makeup every time. Remember, makeup is about expression, so embrace your unique beauty and have fun experimenting!
To truly enhance your makeup routine, consider the benefits of a customized approach. While sticking to a familiar routine can be comforting, it’s important to note that what works for one person might not work for everyone. A personalized makeup routine takes into account your unique features, skin tone, and coloring, ensuring that each product enhances your natural beauty.
Why Customize?
- Tailored Solutions: A custom routine eliminates guesswork by providing products specifically chosen for you.
- Enhanced Results: When makeup is applied with your individual characteristics in mind, the transformation can be remarkable.
- Expert Guidance: Personalized packages often include professional insights, helping you to make informed choices.
By combining these tailored solutions with your creativity, you can discover a routine that not only meets your needs but also celebrates your individuality. Dive into the experience of a makeup routine designed just for you, and enjoy the process of finding what truly makes your beauty shine.
Unveiling the Platinum Package: Elevate Your Beauty Routine
What Sets It Apart?
The Platinum package takes beauty to the next level by offering an all-inclusive experience that goes beyond the essentials found in the Gold package. Here’s a breakdown:
1. Comprehensive Makeup Kit:
- Foundation Essentials: Includes a Foundation Primer and a luxurious Luminous Cream Foundation for a flawless base.
- Perfecting Tools: A Luminous Cream Concealer and HD Pressed Translucent Powder work together to create a smooth, matte finish.
2. Enhanced Glow and Definition:
- Illumination & Color: Elevate your look with a Pressed Illuminating Powder and Convertible Color Wand for cheeks and lips.
- Brows on Point: A precise Brow Pencil and Setting Gel ensure perfect arches every time.
3. Eye-Catching Eyes:
- Versatile Eye Essentials: Dual Action Highlighter Pencil and Eye Primer create a flawless canvas for shadow application.
- Color & Definition: Receive two Eyeshadow Colors, complemented by a Waterproof Gel Eyeliner Pencil for striking eyes.
- Lashes & Brows: With HD Volumizing Mascara, achieve lush lashes that last all day.
4. Picture-Perfect Lips:
- Long-Lasting Definition: A Waterproof Gel Lip Liner Pencil aligns with a signature Platinum Collection Lipstick, ensuring your lips make a statement.
5. Exclusive Toolset:
- Master Your Makeup: Own the complete 12-Piece Deluxe Brush Set designed for precision and versatility.
6. Exclusive Content:
- Step-by-Step Guidance: A tailored How-To Video Series accompanies your kit, providing expert tips and tricks.
In summary, the Platinum package offers an upgraded selection of products and resources, making it an unparalleled choice for those seeking comprehensive beauty solutions beyond the Gold package.
Unlock Makeup Secrets with TV TALK
Struggling with makeup challenges? TV TALK is here to save the day! Tune in as Tara addresses your most pressing beauty questions swiftly and effectively.
What Can You Expect?
- Quick Solutions: Learn how to tackle common makeup issues in a matter of minutes.
- Expert Advice: Gain insights directly from a professional, ensuring tips are both practical and reliable.
- Engaging Content: Each video is designed to be interactive and easy to follow.
These video tutorials are perfect for anyone looking to improve their makeup skills and achieve professional results at home. Catch the latest episodes on popular platforms like Instagram IGTV to stay updated and inspired.
Related Article:

Revitalize Your Everyday Makeup Routine: Expert Tips for a Flawless Face

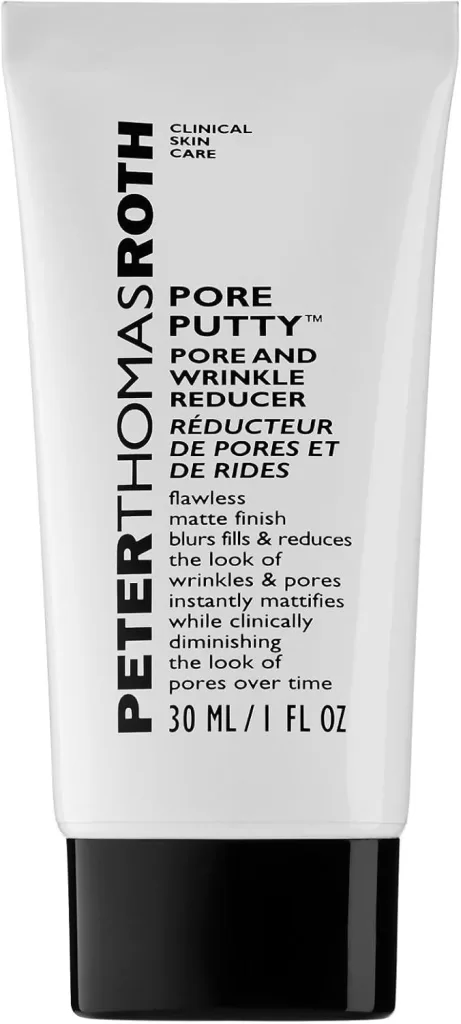
THE Best Peter Thomas Roth – Pore Putty Pore and Wrinkle Reducer 1 Fl Oz New by Peter Thomas Roth
Explore more articles like this @ Where And How Resources
If you found this article helpful, don’t forget to share it with your friends and followers!
